X11vnc and Linux Mint 19
TL;DR
Here are the steps to install X11vnc, and tunnel connections to remote machines through SSH.
Install and Configure SSH
See this post: Setup SSH for Local Access.
Install and Configure X11vnc
Firstly, I’d like the thank the author of this article, as the majority of the steps below come from his (or her) original post.
Install x11vnc:
|
|
Create the directory that will hold the password and configuration files:
|
|
Create a password for the X11vnc server:
|
|
Create a systemd service file for the X11vnc service:
|
|
Copy the text below into the x11vnc.service file:
|
|
Save and close the service file created, and copy it to /etc/systemd/system/:
|
|
Now edit the graphical.target file:
|
|
The final version will look like this:
|
|
Save and close the graphical.target file, and copy it to /etc/systemd/system/:
|
|
Enable the X11vnc service to start up on boot, and to kick off the service now:
|
|
Connecting to the X11vnc Host
Heed and Read: The Following steps should be done on the PC that will connect to the X11vnc host.
Open up your Terminal, and type the following:
|
|
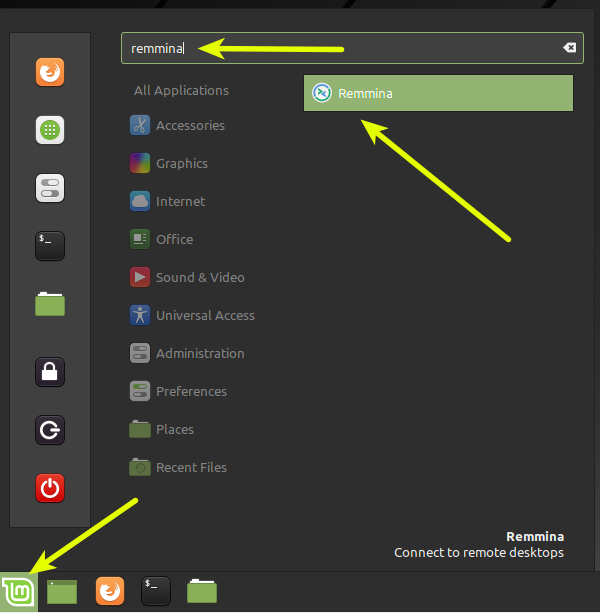
Using the Linux Mint menu find “remmina” to open the main connection window:

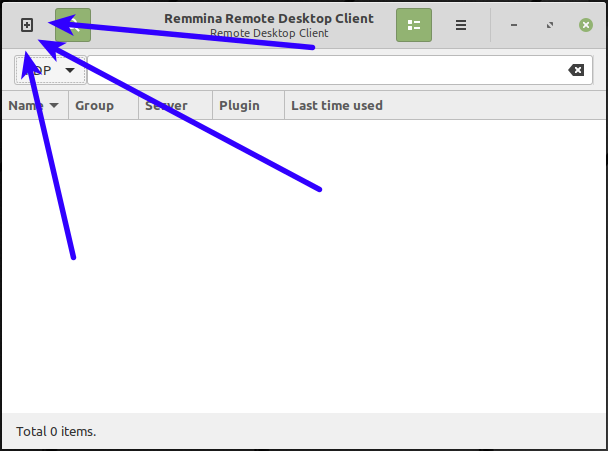
Now add a new VNC Connection Profile:

Open a Terminal window, and enter the follow command to establish an SSH connection:
Note: If you have not followed the steps in my other post, you’ll need to do that first, and the come back to this.
|
|
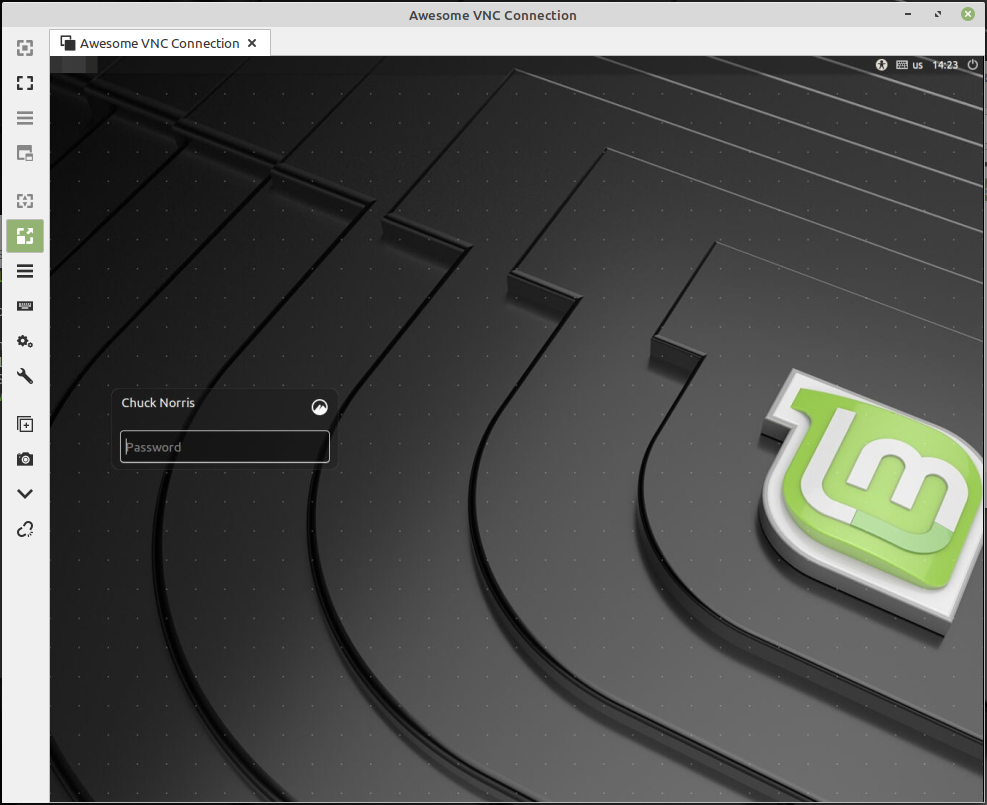
Double-click the Connection Profile you created earlier, and remotely connect to your X11vnc host:
The Rest of the Story
I’ve tried several different ways to remote control my Linux Mint PCs at home, and have not found a way I really like. Being honest, I really like Windows Remote Desktop (RDP), because it creates a “private” session; meaning if I am remotely connecting to my host PC, no one in the vicinity of my host PC can see what I am doing if the monitor happens to be on. Windows RDP will “lock” the host PC, and when I am back in front of the physical PC I can pick right back up where I have left off.
I’m still playing around with X2Go, but unfortunately X2Go does not play nice with Cinnamon (the primary Linux Mint desktop environment).
I have also been unsuccessful with xRDP, but I’ll keep experimenting with xRDP on Linux Mint.
If you have been able to get X2Go or xRDP to work on Linux Mint (with Cinnamon), please leave a comment on how you got that to work :-)
X11vnc + SSH
What I have been able to get working is Virtual Network Computing (VNC), specifically X11vnc.
I use this in conjunction with SSH (TCP forwarding & connection forwarding enabled). This will enable a secure connection with the VNC host over a secure SSH tunnel.
In this post, I will be taking you through the following:
- Install and Configure SSH
- Install and Configure X11vnc
- Connecting to the X11vnc Host
Install and Configure SSH
I have a post I wrote on this with all the details, and you can find that post here.
Install and Configure X11vnc
Firstly, I’d like the thank the author of this article, as the majority of the steps below come from his (or her) original post.
Ok, so now let’s install the x11vnc server.
Start by opening a Terminal window, and entering the following command:
|
|
Now that X11vnc server is installed, create the directory that will hold the password and configuration files. This will be a system-wide accessible folder. In the Terminal window, type the following command:
|
|
Next, create a password for the X11vnc server. VNC has a password limit of eight (8) characters (lame), so keep that in mind. Additionally, you will be prompted to enter the password twice.
|
|
You are going to want the X11vnc server to start on boot, even if there is not a logged-in User. To accomplish that, create a systemd service file for the X11vnc service.
|
|
And copy the text below into the x11vnc.service file:
|
|
You’ll notice in the text above, the command parameter -localhost. This will force you to use an SSH tunnel in order to connect to your X11vnc host machine. Ultimately, only use your VNC connection over a “trusted” network, but if you were to enable this on a laptop, you want to be confident that you are not exposing your listening VNC connection on an “untrusted” network, for example if you were to connect to the Internet at a coffee shop.
If you followed the instructions in the “Install and Configure SSH” section above, you’ll have your firewall set up to only allow Local Area Network (LAN) connections to your host machine, and adding the -localhost parameter will afford an extra layer of security specific to your VNC connection.
For more information on the -localhost parameter, you can check out this post.
Save and close the service file created, and copy it to /etc/systemd/system/.
|
|
Now edit the graphical.target file.
|
|
You’ll change the line:
|
|
to:
|
|
The full, final version will look like this:
|
|
Save and close the graphical.target file, and copy it to /etc/systemd/system/:
|
|
Finally, run the following commands in order to enable the X11vnc service to start up on boot, and to kick off the service now so you can move on to the next section.
|
|
Connecting to the X11vnc Host
There are multiple tools that you can use to connect to your X11vnc host. My favorite is Remmina. So here are the steps to get Remmina installed, and how to use it to remotely administer you X11vnc host.
The Remmina website has an excellent How to install Remmina guide, however it will be sightly different to make sure the VNC plugin gets installed as well.
Heed and Read: The Following steps should be done on the PC that will *connect to* the X11vnc host.
Open up your Terminal, and type the following:
|
|
Note: There is also a Remmina snap package if you prefer to go that route. Obviously, the instructions above do not apply to the snap package install.
With Remmina installed, create a Connection Profile in Remmina.
Using the Linux Mint menu find “remmina” to open the main connection window.
Now add a new VNC Connection Profile. For now just copy the settings (except the name, name it whatever you wish) in the screenshots below.
Here is brief explanation of the settings in the above screenshot:
- Protocol: Is a drop-down menu, and you will want to select “VNC - VNC viewer”. This is why
remmina-plugin-vncwas used in the install command above. - Server: Set this to “localhost:5901”. This works in conjunction with the SSH tunnel; forcing VNC to connect through the SSH tunnel.
- User password: You set the VNC password on this step, that is the same password you would use here.
- Color depth and Quality: Those settings are totally up to you.
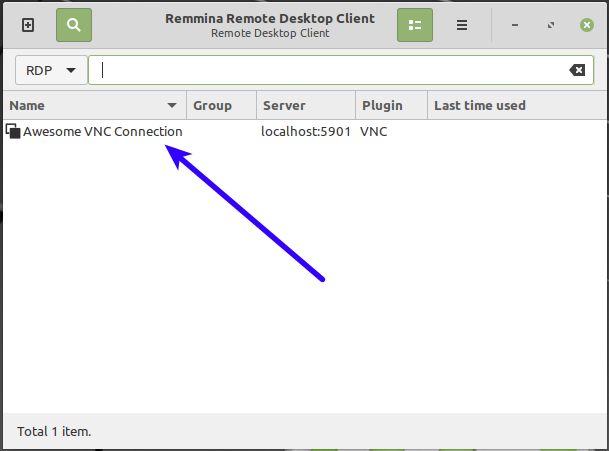
After entering the settings, don’t forget to click “Save”. You should see your Connection Profile in the Main Connection Window.

Now open a Terminal window, and enter the follow command to establish an SSH connection. You will be prompted for a password, and this is the password of the User account on the remote PC.
Note: If you have not followed the steps in my other post, you’ll need to do that first, and the come back to this.
|
|
The first time connecting you will receive this message:
|
|
Now that the SSH connection is established, you can double-click the Connection Profile you created earlier, and remotely connect to your X11vnc host.
Conclusion
With the connection established, you can now remotely administer your X11vnc host.
Hope this is helpful :-)
Feel free to leave comments, or questions below.
End of Line.