Setup SSH for Local Access
TL;DR
Here are the steps to set up an SSH Server for connecting to your PC remotely from within your Local Area Network (LAN).
Install Tasksel
To install Tasksel, just open up a Terminal window, and type the following:
|
|
Install the SSH Server
- Open up a Terminal window, and start Tasksel
|
|
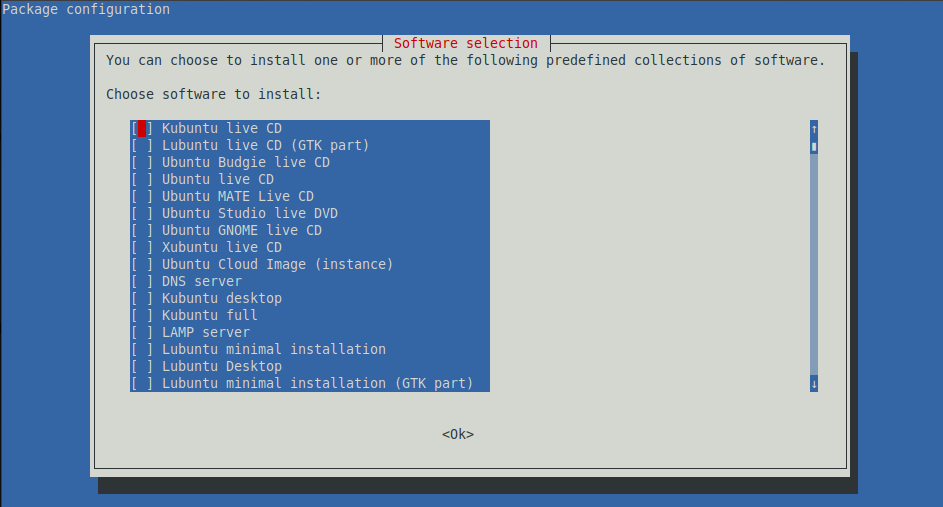
You should see the following:
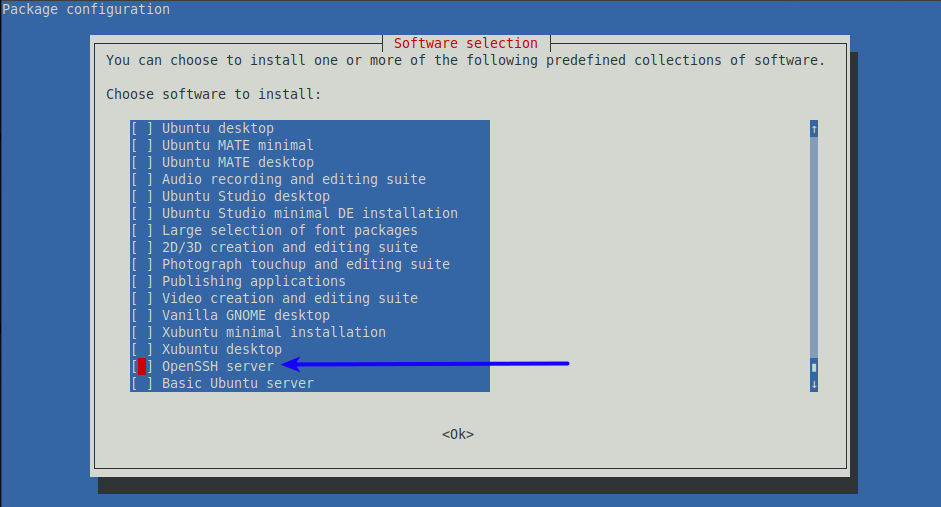
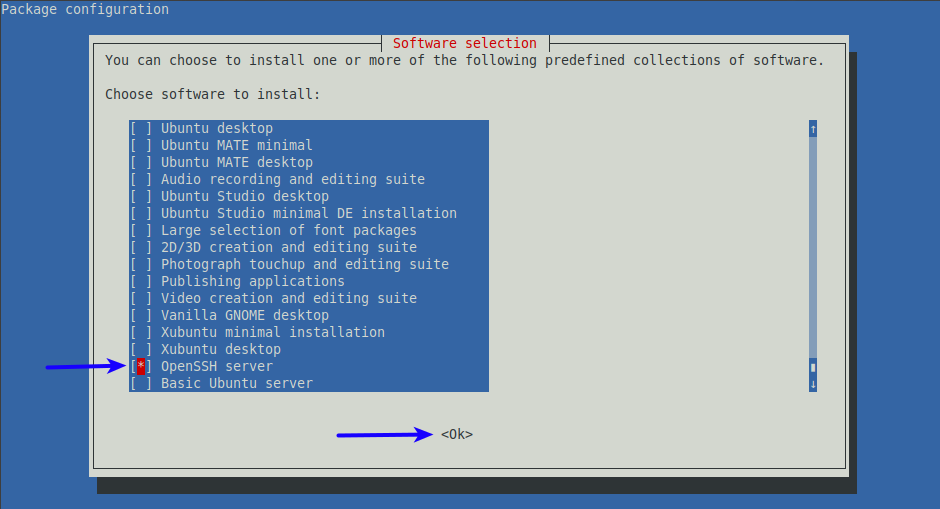
- Now find the option for SSH, select that using your keyboard.
Configuring Your SSH Server
Open up a Terminal window and type the following:
|
|
Now find this section of the file with the heading # override default of no subsystems, and replace it with the text below.
|
|
Save the file, close xed, and restart the SSH Server.
|
|
Secure the SSH Server
If you have not activated your firewall, you can do that by running this Terminal command:
|
|
To only allow traffic from your LAN to your SSH Server, run following Terminal command:
|
|
Connect
From a different Linux machine, open up a Terminal, and enter the command to connect:
|
|
Verify the host authenticity; you can answer “yes” here:


To log out, just type exit.

The Rest of the Story
So just a note before I begin. I have not used SSH to connect to any of my machines over the Internet; I have only used SSH within the context of a Local Area Network (LAN). There are more precautions one needs to take when exposing access to your PC over the Internet, and I will not be getting into those in this post. With that said…on with the post!
As I have mentioned in other posts, my OS of choice is Linux Mint, and so these steps will apply to Linux Mint 19.2. However, with Linux Mint being Ubuntu-based, and therefore Debian-based, these step may apply to your non-Linux Mint machine :-)
Installing Tasksel
You will first need to install an SSH Server on your machine. I like to do that through a utility called “Tasksel”, which is a Debian utility. If you want to know more about Tasksel, you can get the low-down here.
To install Tasksel, just open up a Terminal window, and type the following:
|
|
Now that you have Tasksel installed, we can install our SSH Server.
Installing an SSH Server
In order to connect to your machine remotely, you will need an SSH Server to handle those remote connections.
In the previous section you installed “Tasksel”, and now we will use that to set up our SSH Server:
- Open up a Terminal window, and start Tasksel
|
|
You should see the following
- Now find the option for SSH, select that using your keyboard (mouse clicking will not work here), move the red box inside the brackets, press space bar, and you will see an asterisk (*) appear indicating that the “OpenSSH Server” option is selected. Then press “Tab” on your keyboard to select the “OK” option at the bottom, and finally press the “Enter” key to kick off the installation.
Configuring Your SSH Server
After completing the steps above your SSH Server will be up and running. There are a couple of things that I change from the default settings, so let me show you that now.
Open up a Terminal window and type the following:
|
|
Now find this section of the file with the heading # override default of no subsystems, and replace it with the text below.
|
|
Save the file, close xed. Now you will need to restart the SSH Server for the setting to take affect. Open up a Terminal window, and type the following:
|
|
Congratulations, you now have a running SSH Server! :-)
Securing Your SSH Server
As I mentioned earlier, I am not 100% certain on how to secure an SSH Server over the Internet, so I really only use SSH with Intranet, or LAN, connections. Even over LAN connections though, I do my best to secure access to my SSH Server using the built-in firewall, Uncomplicated Firewall (UFW).
For starters, I only allow SSH connections from my LAN. That way when I'm at a coffee shop, for example, I do not need to worry about my SSH Server being exposed.
If you have not activated your firewall, you can do that by running this Terminal command:
|
|
To only allow traffic from your LAN to your SSH Server, run following Terminal command (replace 192.168.77.0/24 with your LAN address block, so a very common block would be 192.168.0.0/24):
|
|
Note: The default port for SSH is 22, but remember in the Configuring Your SSH Server section we changed the default port to “2019”.
Normally, I like to use the graphical interface to UFW, called GUFW. This is the built-in graphical interface for Firewall management in Linux Mint.

However, for the sake of brevity, it was easier to provide the Terminal command for adding the rule.
Additionally, for more information on setting up UFW and GUFW, check out this article from “How-To Geek”.
Connect to Your SSH Server
Now that your SSH Server is set up, and a bit more locked down, you can connect to your PC remotely. So now, from a different Linux machine, open up a Terminal, and enter the command to connect, which has a structure like this ssh [user]@[IP Address] -p [port number]:
|
|
When connecting for the first time, you will be asked to verify the host authenticity; you can answer “yes” here:
To log out, just type exit.
Conclusion
Following the steps above, you can now remotely connect to your PC, on your LAN, using SSH.
Hope this is helpful :-)
Feel free to leave comments, or questions below.
End of Line.