Next, you will need to enable Developer Options, and USB Debugging on your device. Here are the steps on an Android 9, Pixel XL that you will need to take:
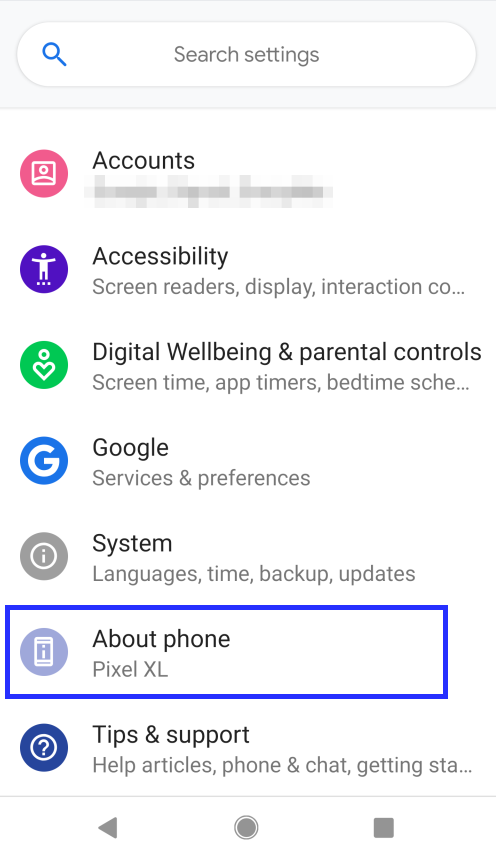
Open “Settings”, and select “About Phone”.
About Phone
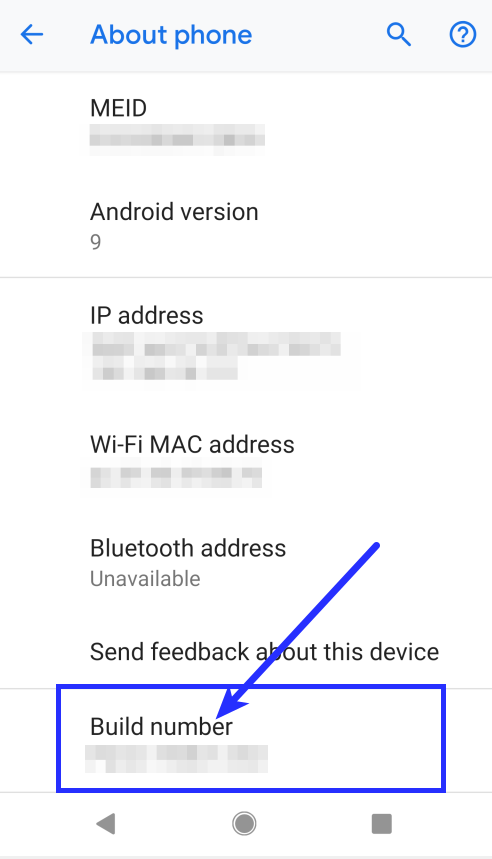
Tap on “Build number” seven times.
Build NumberDeveloper Mode Enabled
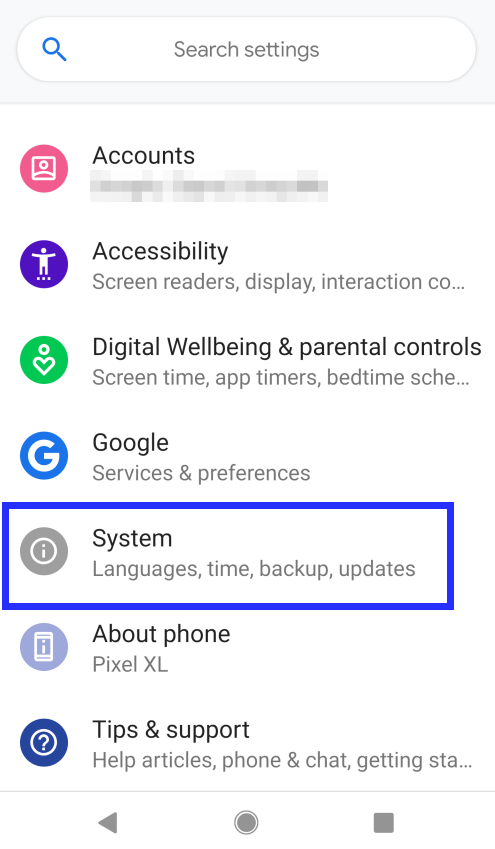
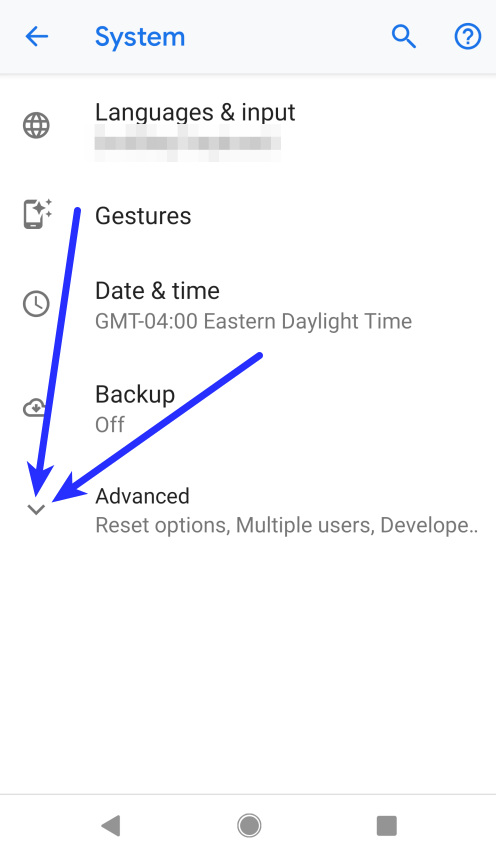
Go back to “Settings”, select “System”, then “Advanced”, and select “Developer options”.
SystemAdvancedDeveloper Options
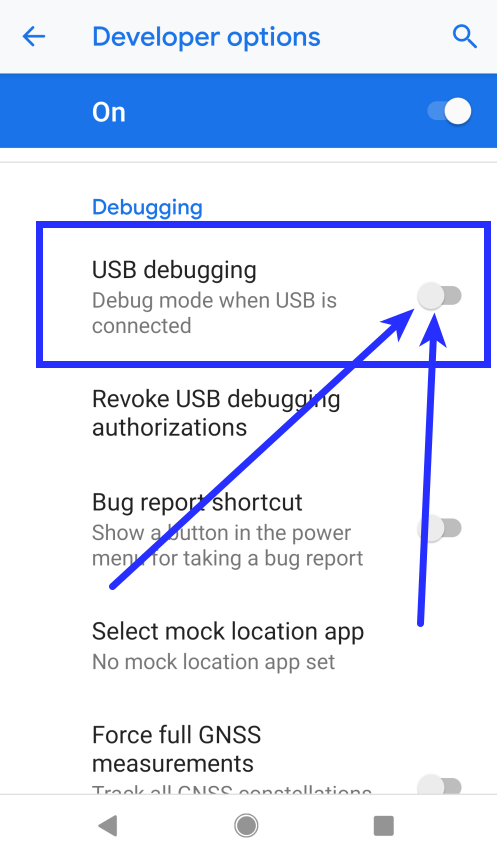
Scroll down, and check the “USB debugging” entry under “Debugging”.
USB debuggingAllow USB debuggingSuccessfully Enabled USB Debugging
Plug your device into your computer.
On the computer, open up a terminal/command prompt, and type adb devices.
1
2
3
4
adb devices
List of devices attached
* daemon not running; starting now at tcp:5037
* daemon started successfully
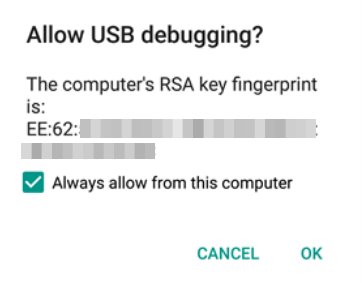
A dialog should show on your device, asking you to allow usb debugging. Check “Always allow from this computer”, and choose “OK”.
Alway allow USB debugging
Unlocking the Bootloader
Warning:After you complete the steps to unlock the bootloader, the phone will perform a Factory Reset! You will loseALLthe data on you phone, so be prepared!
Step 1 Caveats
There are several things to note about step 1 (one) below.
Firstly, I am preforming these steps on a straight out-of-the-box Pixel XL. That means the initial settings on the phone are the absolute defaults. For example, I have not updated to Android 10, even though I keep getting the notification.
Secondly, I had to be connected to Wi-Fi for the “OEM unlocking” option to be available, otherwise it was grayed out (i.e. disabled).
And thirdly, I need to mention, if you are having trouble with the “OEM unlocking” option not being available, then follow these instructions: [How-to] Unlock bootloader on Verizon Pixel/XL.
The Actual Steps
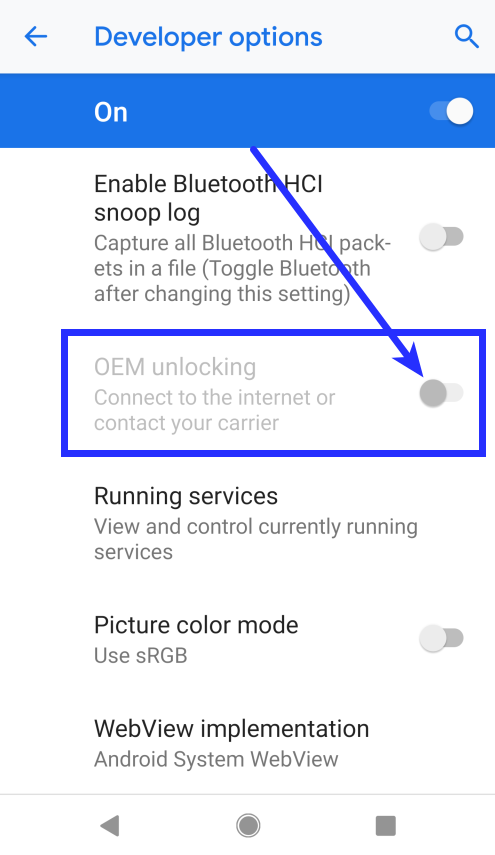
Enable “OEM unlocking” by going to “Settings”, “System”, “Advanced”, and then “Developer options”.
SystemAdvancedDeveloper OptionsOEM unlocking
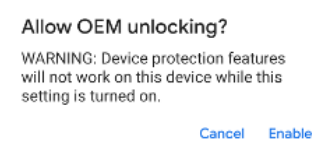
Tap “Enable” when presented with this pop-up
Confirm to Enable OEM unlocking
Connect your Pixel XL to your computer via USB.
On the computer, open a Terminal window, and type:
1
adb reboot bootloader
Once the device is in fastboot mode, verify your computer finds it by typing:
1
fastboot devices
- If you see `no permissions fastboot`, try running `fastboot` with the `sudo` command.
Now type the following command to unlock the bootloader:
1
fastboot flashing unlock
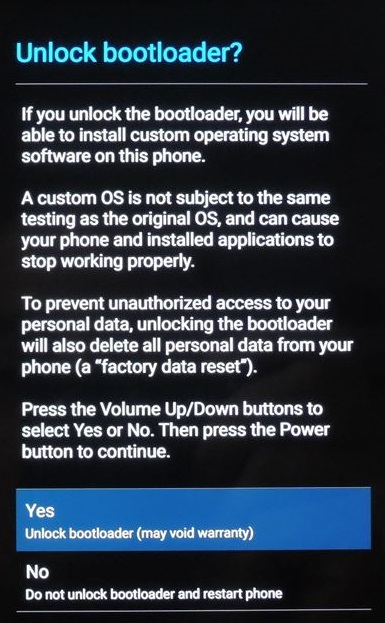
Use the volume up button on the side of the phone to highlight “Yes Unlock bootloader (way void warranty)”, then press the power button on the side of the phone to confirm.
You will then be brought back to the bootloader screen, and you will see at the bottom: “Device is UNLOCKED”.
Again, using the volume up/down buttons on the side of the phone, adjust to action selector to read “Power off”, and then press the power button on the side of the phone.
Power off / Reboot device
Wait for the phone to power off completely, and then turn the phone on again. This boot will take a while as the phone will be performing a factory reset.
Download the latest build of /e/ OS for your Pixel by going here.
To download the latest file, click on the link with the highest date. The files are formatted this way:
e-0.7-p-YYYYMMDDXXXXX-dev-marlin.zip
YYYY = Year
MM = Month
DD = Day
XXXXX = random build number (I think)
As of this writing, the latest file is: e-0.7-p-2019110830006-dev-marlin.zip
Once you have downloaded the zip file, it's best to ensure the validity of the file. To do that, click on the “SHA256” link next to the file you downloaded:
Click on SHA256 link
You will be presented with a screen that looks like this:
/e/ OS SHA256 sum
Now open up a Terminal window, and navigate to the directory where you downloaded the zip file, and type the following command:
Note:Be sure to change the file name to the name of the file you downloaded. As stated before, the exact file name used in this post is only valid for the time of this post.
1
sha256sum e-0.7-p-2019110830006-dev-marlin.zip
Now compare the two outputs to be sure they match:
The version of LineageOS on which /e/ OS is based, has a built-in recovery. However, in order to install /e/ OS to begin with you will have to flash a temporary recovery called TWRP
Download the latest version of TWRP for the Pixel XL by going here.
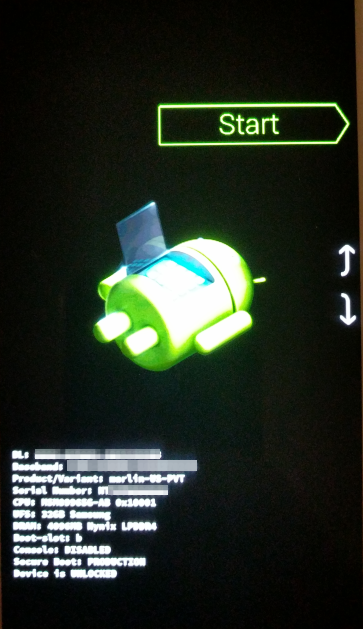
Your Pixel XL will return to the bootloader menu:
Bootloader Menu
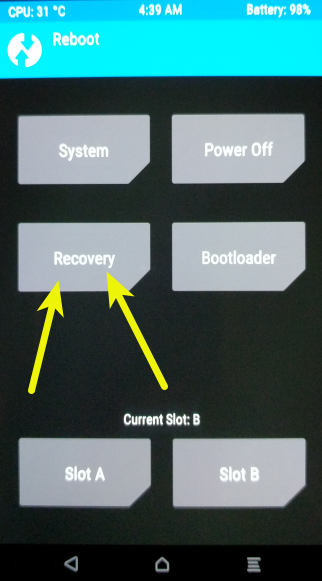
Use the volume down button on the side of the phone to change the selection to “Recovery mode”, then push the power button on the side of the phone to select that option
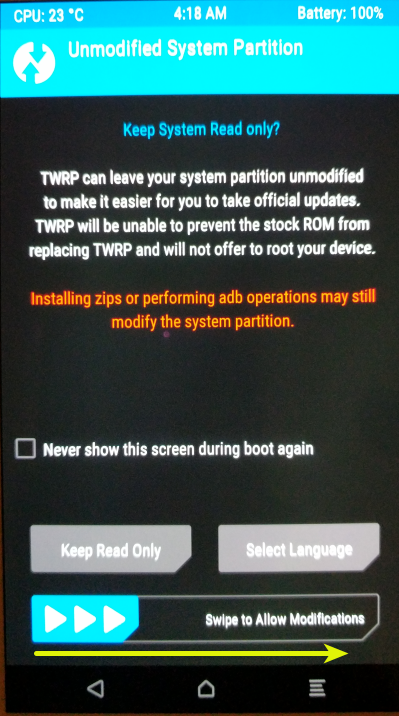
Your Pixel XL will reboot, and then enter the TWRP recovery:
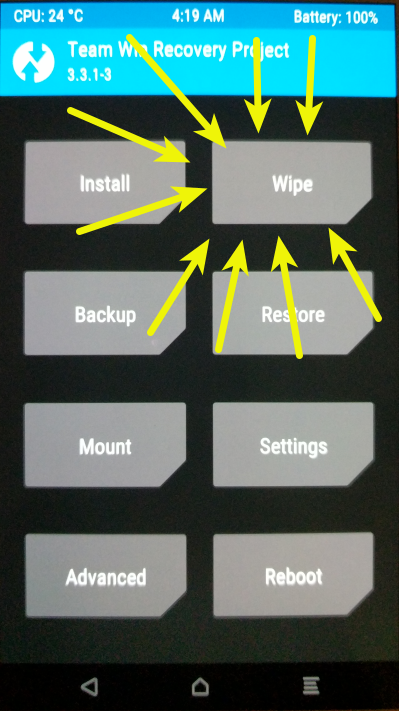
At the TWRP main menu, tap “Wipe”
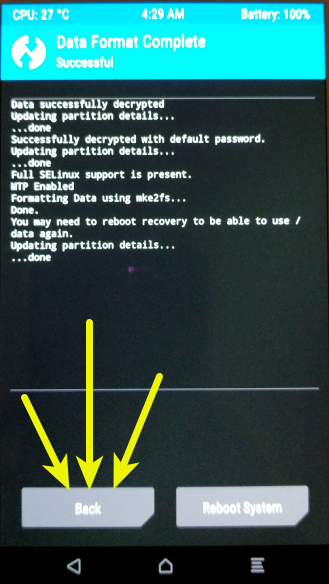
Now tap “Format Data”, and continue with the formatting process by typing “yes” then tapping the check mark on the keyboard. This will remove encryption as well as delete all files stored on the internal storage.
Return to the previous menu by tapping the “Back” button, and then the back triangle
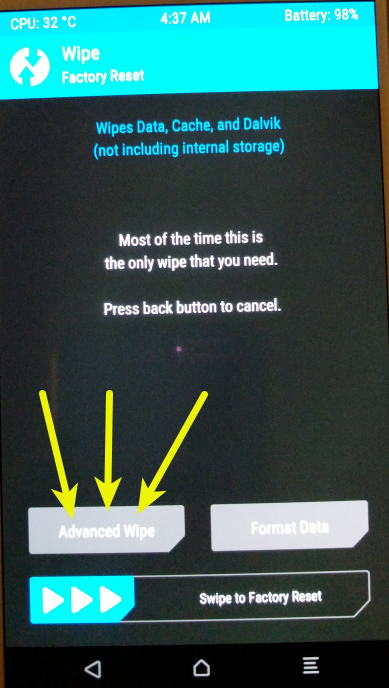
Now tap “Advanced Wipe”
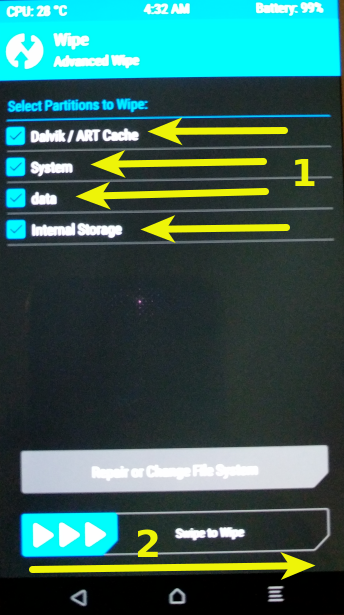
Select all of the options, and then “Swipe to Wipe”
Note:If you see Error opening: '/data/media' (No such file or directory), you can continue, don’t worry.
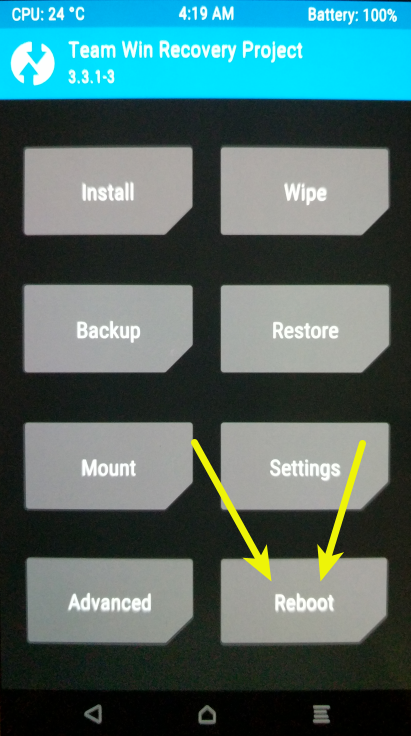
Now tap “Back”, then tap the back triangle twice to get back to the main menu.
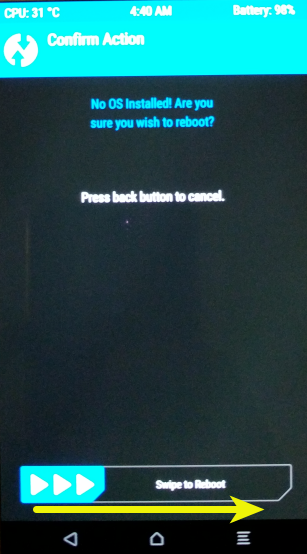
Tap “Reboot”, then tap “Recovery”, and “Swipe to Reboot”.
The Pixel XL will reboot, and return to the TWRP main menu
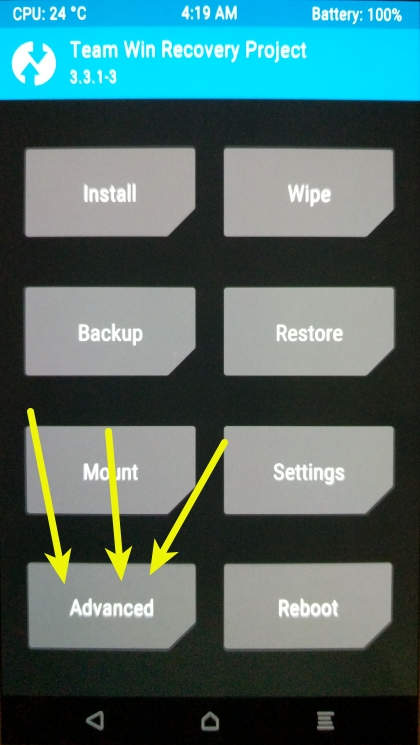
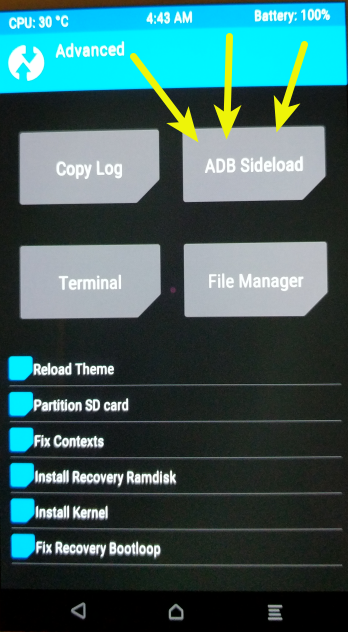
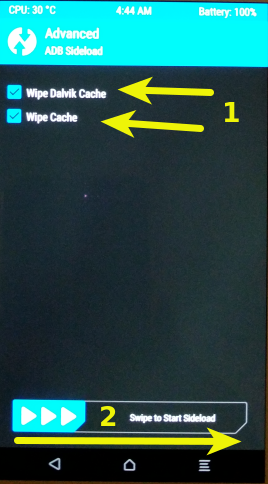
Tap “Advanced” on the TWRP main menu, then “ADB Sideload”
Select “Wipe Dalvik Cache”, “Wipe Cache”, and then “Swipe to Start Sideload”.
On your computer you now start the sideload of /e/ OS:
In the Terminal, navigate to the directory where you downloaded the e-0.7-p-2019110830006-dev-marlin.zip file.
Type the following to push the file to your Pixel XL:
1
adb sideload e-0.7-p-2019110830006-dev-marlin.zip
Note:The file may not be named identically to what stands in this command, so adjust accordingly.
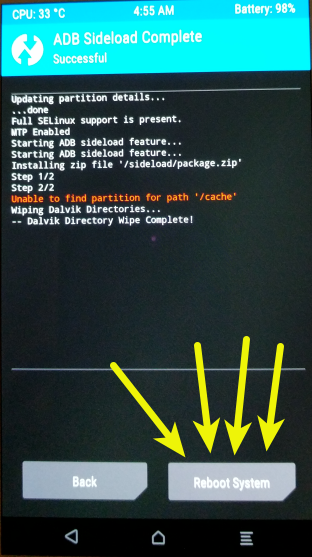
You will see progress in the Terminal, and on your Pixel XL:
Now tap “Reboot System”, then “Swipe to Reboot”, and your Pixel XL will boot into your newly installed /e/ OS. Follow the on-screen instructions to set up you Pixel XL, and you're ready to start experimenting.
Conclusion
There you have it, you now have the privacy-respecting /e/ OS on your Pixel XL. Proceed to the bonus content if you want to root your Pixel XL. If you do not want to root your device, then you are done!